Get Started with Windows 10

Summary

In preparation for the launch of Windows 10 this summer, many of you might want to get up to speed with the new features and functions included in the new version. I have been evaluating Windows 10 since October 1st 2014 and I have managed to the see the operating system go through its ups and downs during that time. The experience has afforded me the ability to have an intimate experience with this platform.  For the average user who probably just started learning about Windows 10 a couple months ago, a few days ago or even a few months from now, these Getting Started guides should help you hit the ground running. Don’t worry, I will continually update this wiki-article with new content. Please don’t hesitate to share your feedback in the comments.

Details

Before you start

Pre-requisite Task

When making significant changes to your computer such as updating the operating system, you should always backup. See links to resources about backing up by clicking the link for the respective version of Windows you are running: Windows XP, Windows Vista, Windows 7, Windows 8/8.1

Installation

Troubleshooting installation:

Customize and Personalize

After Installing Windows 10

Everyday Tasks

Maintenance

Miscellanous

Advance

3 Comments

Filed under 10 Journal

How to: Create a Recovery Drive for reinstalling Windows 10

One of the big questions persons interested in Windows 10 are asking is how will they reinstall the operating system if needed? As you might know, many users will upgrade to Windows 10 using Windows Update instead of using media DVD or USB. Microsoft will provide backup media for persons who might be on a slow connection. Even for persons who might be able to perform the upgrade using Windows Update, what are your options when the time comes to perform a reinstallation? In this article, we take a look at the options available.

Details

Microsoft noted the following options are available:

With Windows 10, you can create your own recovery media and back up the pristine state of the operating system and preinstalled software. If things go wrong and you are unable to refresh or reset your device successfully, you can boot the device using recovery media and reset to the prior pristine state.

Source: http://blogs.windows.com/bloggingwindows/2015/03/16/how-windows-10-achieves-its-compact-footprint/

What you will need?

  • USB thumbdrive with 4 GBs of space or more
  • Your computer running Windows 10

Click Start and type: create recovery

Hit Enter on your keyboard

ImageYou can also find the Recovery drive creator by opening Control Panel (Windows key + X)

Open Recovery

Click Create Recovery drive

Make sure your thumbdrive is connected

Image

Click Next

Image

Wait while the wizard prepares to copy files to your thumbdrive.

Image

Again, make sure your thumbdrive is at 4 GBs, click Next

Image

The Recovery drive wizard will provide a final warning.

Image

Creating the recovery drive can take some time. You can do something else while it is prepared.

Image

When complete, click Finish

Booting from Recovery Drive and Reinstall Windows 10

When you need to use the recovery drive, simply connect it to your computer and boot from it. The methods for booting from a thumbdrive might vary depending on the model and make; consult your computer documentation for instructions how to boot from external media. Some might require that you press ESC, F2, F9, F10, F11, DEL or a combination of keyboard commands. Some might even require that you boot into the BIOS or Firmware and change boot options.

If you are installing from a thumb drive, see the following instructions how to prepare your computer to boot from one:

http://windows.microsoft.com/en-NZ/windows7/Start-your-computer-from-a-Windows-7-installation-disc-or-USB-flash-drive

Image

The Windows logo will appear on screen, this might be here for a while, as long as you see the indicater, everything should be ok.

Image

Choose your keyboard layout – in my case, I choose US. If you don’t see your keyboard layout listed, click See more keyboard layouts

ImageClick Troubleshoot

ImageClick Recover from a drive

Follow the on screen instructions and wait while Windows 10 reinstalls.

Resources:

How to upgrade to Windows 10 from within Windows 8.1 or Windows 7 using Windows Update

How to: upgrade from previous versions of Windows using Windows 10 ISO file

How to: Switch from 32 bit versions of Windows to Windows 10 64 bit

How to reserve your free upgrade to Windows 10

1 Comment

Filed under Uncategorized

How to: Fix Windows 10 Setup Failure

This article can now be found in its entirety at Groovypost.com

Here’s What You Can Do if Windows 10 Upgrade Fails

Remember to check bonus tips section at the bottom for updated information.

Also Review: How to: 10 Tips before installing Windows 10

Thank you,

Andre


Leave a comment

Filed under 10 Journal

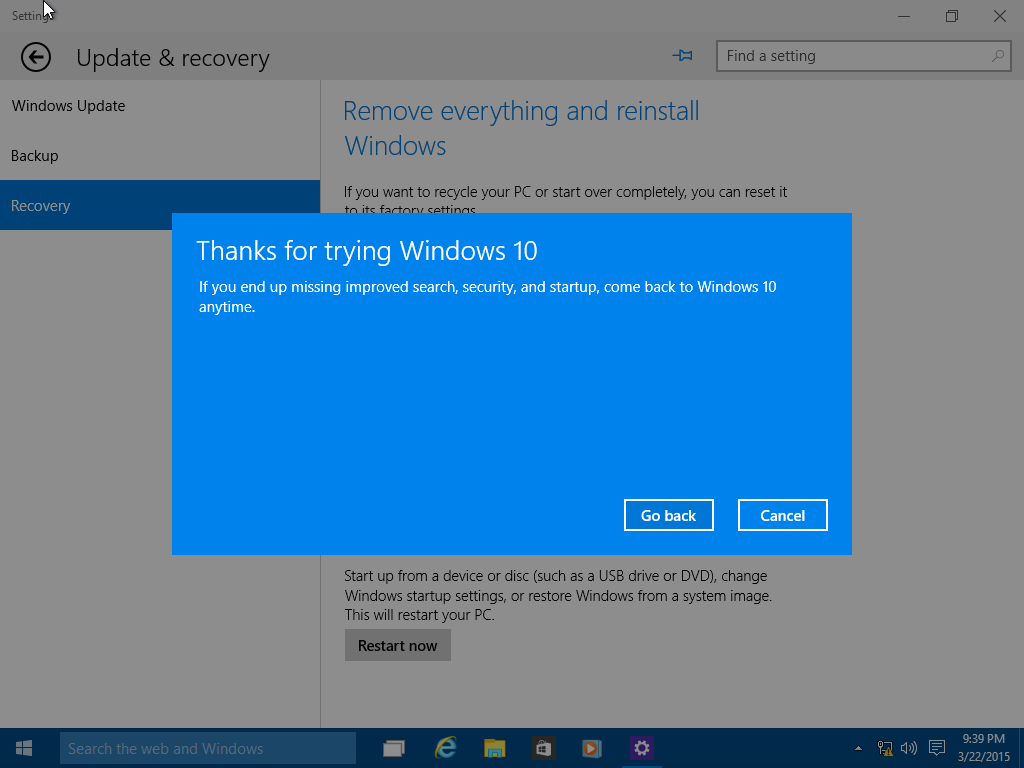
How to: Rollback to a previous version of Windows from Windows 10

NOTE: Please be aware the Windows.old folder located at the root of the local disk where Windows 10 is installed will be deleted after 31 days automatically. The Windows.old folder is used to facilitate the rollback. So please perform any rollback within 31 days or this option will no longer be available. Otherwise, create a backup before upgrading to Windows 10.

See links to resources about backing up by clicking the link for the respective version of Windows you are running: Windows XP, Windows Vista, Windows 7, Windows 8/8.1

If your Windows 10 installation is outside of the 31 day window, please review instructions for reinstalling Windows 8.1 or Windows 7 manually:

How to: Reinstall or Restore your original Windows installation after evaluating the Windows 10

Summary

Throughout the history of Windows revisions, Microsoft has included an option to uninstall the operating system when you upgrade to a newer version. My recollection of this capability goes back to Windows ME which included the option to uninstall the operating system and restore to a previous version of Windows (I was running Windows 98 SE at the time). Microsoft has supported this functionality in its NT based versions of Windows too, albeit not in a seamless way. The ability to restore a Windows 8.1 installation to Windows 7 required knowing some command line operations that in some instances didn’t guarantee the process would go according to plan. With Windows 10, it seems Microsoft has listened and has provided a welcome option to its recovery tools to make it easy to uninstall Windows 10 and go back to your previous version of Windows. This option can be handy for diagnostics purposes, trial and error or to simply go back to a previous version of Windows that works better with your PC.

Please keep in mind, this only works with Windows 7 and later. Because prior versions of Windows such as Windows Vista and Windows XP can only migrate to Windows 10 through a custom install, the command line operations remain your best choice if you do decide to go back. Also keep in mind, if you do a custom install over Windows 7 or later, the Rollback option is not available. This only works if you had done an in place upgrade from Windows 7 or later.

Start

Start by opening Settings – Click Start > Settings or type Settings in the search bar and click it or press Windows key + i

Rollback 2

Click Update and Security

Rollback 3

Click Recovery then click Get started under Go back to Windows 7 or Windows 8/8.1 (depending on the previous version you running)

rollback desktop 4

Here you can make multiple selections why are going back to your previous version of Windows along with additional details or you can choose just one and click Next.

rollback desktop 5

As noted, any configurations made to Windows 10 since upgrading will be lost, so if you installed new programs or hardware drivers or made personal settings, those will be deleted.

rollback desktop 5

Click Next

rollback desktop 6

Make sure you have your password ready to sign into your old version if you had been using one. Click Next

rollback desktop 7

The process can take a while depending on the amount data, applications and settings. Click Next

rollback desktop 8

Click Go Back to begin the process.

rollback desktop 9

Windows 10 will Restart

rollback desktop 10

This will be your screen throughout the recovery process.

rollback desktop 11

When the process is complete, you will be booted into your previous version of Windows environment.

If you cannot load the Windows Desktop, you can initiate a Rollback using the following method:

Rollback 3a

Log out
At the Sign In screen, hold down the shift key on your keyboard while clicking the Power button on the screen
Continue to hold down the shift key while clicking Restart
Continue to hold down the shift key until the Advanced Recovery Options menu appears

Rollback 4

Click Troubleshoot

Rollback 4a

 Click Advanced options

5

Click Go back to the previous version of Windows

Related:

How to: upgrade from previous versions of Windows using Windows 10 ISO file

Get started with Windows 10

344 Comments

Filed under 10 Journal

How to use Windows 10’s built in Hyper-V for creating Virtual Machines

This article can now be found in its entirety at Groovypost.com

Setup a Virtual Machine with Windows 10 Hyper-V

Thank you,

Andre

3 Comments

Filed under Uncategorized

A Quick Look at using Windows 8.1 Update 1

It has been ages since I made a post on here. Sorry about that, but I will get into the details over the weekend. It seems like just yesterday Windows 8.1 was released, 12 months after the initial release of Windows 8 RTM itself. Yesterday, Microsoft made Windows 8.1 Update 1 available to MSDN Subscriber Downloads for persons testing Microsoft technologies. I decided to bite the bullet early and give it an early spin before it officially reaches the general public on April 8th 2014 through Windows Update.

After seven months of using Windows 8.1 full time at work, I have come to accept and appreciate Microsoft’s ever evolving Windows client, gaining new features and functionality, not to mention stability at a rapid pace. Windows 8 is now a dramatically different experience from what was initially released in October 2012. With 8.1, I immediately took advantage of the desktop enhancements for keyboard and mouse users, utilizing options like boot to desktop for instance and app view for quick access to both desktop and modern apps.

Update 1 continues Microsoft’s refinement of the rough edges, presenting even greater accessibility to functionality such as Power and Search once hidden in hot corners and menus. Other noticeable changes include title bars, minimize and close buttons now available in modern apps. Another great feature includes the ability to pin your favourite modern apps to the Windows Taskbar. Lets take a quick look at getting it up and running on a Windows 8.1 install.

Please note, this is standalone Windows Update installers I am using which requires installation in a specific order. On April 8th, Windows Update will take care of this, but for this article sake, I will describe the experience. Depended on your system, Windows 8.1 Update 1 is provided as 6 updates, in my case, I only needed to apply 5, since KB2919442 was already installed.

update to windows 81

Recommended Install Order
1.  KB2919442 – already installed
2.  KB2919355 – installed
3.  KB2932046 – installed
4.  KB2937592
5.  KB2938439
6.  KB2949621

update 355

The biggest one of them all is KB2919355, which took quite a while to install. In fact, I did this on my work computer around 3:30 PM and I leave work at 4:30, KB2919355 took about 30 minutes be completed and required a reboot.

image

The other updates like KB2932046 called Feature Updates, took less time, but each required a reboot. I stopped after the 3rd and finished up the next day. After KB2919355, the unique features started to show up, such as Power and Search options appearing on the Start Screen. I understand that boot to desktop is automatically enabled on mouse and keyboard only systems. I already had this enabled.

last 81 update

The other feature updates completed quickly and I was ready to utilize the improvements in Windows 8.1.

image

A lot of the options to change how Windows 8.1 operates with modern apps and the Start Screen can be found from the Taskbar properties. There you will see a new option to ‘Show Windows Store apps on the taskbar’. Right now, the implementation still feels complete, because Modern apps still remain full screen, although you can have the Taskbar displayed on screen in Modern apps when you have the mouse pointer at the bottom of the screen. This provides easy switching and multi-tasking with Desktop and Modern applications. See below.

best of both worlds2

Here you can see I have a modern app and running and still able to access my Taskbar.

best of both worlds2

The ability to work with mouse and keyboard in Modern apps is a nice welcome, you can easily access window controls such as minimize and close by hovering your mouse pointer at the top of the app screen.

image

By default, apps are now displayed in alphabetical order for easy finding.  There are other options in Windows 8.1 Update I will need to check out. Overall, Windows 8.1 Update 1 makes Windows 8 feel like this is what should have happened from the beginning. Some things still feel disjointed, but a future update is expected to resolve this, providing a windowed mode for modern apps for true multi-tasking and best of both worlds experience.

Its been a long time, but I believe Windows 8 is starting to gain acceptance, the fact that colleagues are coming to me asking about how they can upgrade from Windows 7 is sign enough the hard work that has gone into refining an otherwise great product is paying off. One thing I would have liked was to always have the Taskbar on screen even in Modern apps, but I will work with what I have gotten so far.

6 Comments

Filed under Uncategorized

How to upgrade from Windows 8 to Windows 8.1

Hey folks, its been a long time since I have published a new article, been quite busy since the start of fall, so I have not gotten back into the groove of things just yet. With the release of Windows 8.1 which promises to improve the overall experience of Windows 8, I say why not start off with how to get it.

First things first, I suggest you check Windows Update for the latest updates, make sure your system is fully updated before attempting to install Windows 8.

image

Open Windows Update and click Check for Updates

Once your system is fully updated, we are ready to install Windows 8.1. You might want to do things like disable your Antivirus temporarily, disable startup items. Unplug any unnecessary devices.

store 3

On the Start Screen, click the Store icon

Store 1

As soon as you open the Windows Store, you will see the Update Windows tile. Click on it.

store 2

The Windows 8.1 update page will give information about whats new in Windows 8.1.

store 2

Click Download to start downloading Windows 8. You can keep working while the update is downloading.

Store 4

Wait while Windows 8.1 installs.

image

When all is done, you should have Windows 8.1 installed.

Resources:

Why can’t I update to Windows 8.1?

13 Comments

Filed under 8 Journal

Confirmed: Windows 8.1 RTM coming August 2013

Microsoft today confirmed at the Worldwide Partner Conference, Windows 8.1 the major update to the initial release will be available OEMs this August.

Tami also made a few announcements.

She announced that Windows 8.1 RTM will be available for OEM partners in late August. This means OEMs will be able to get the RTM bits and begin preparing devices with Windows 8.1 just in time for the holidays! We’ll have more details to share in the coming months for consumers and other customers on how to get Windows 8.1. As you have heard, Windows 8.1 is an update that refines the vision of Windows 8. Two weeks ago, we announced the Windows 8.1 Preview for people to try out– if you have not already, check it out and experience the new features and improvements

Source HERE

3 Comments

Filed under IT Professional, Windows 8

Using Compatibility Mode in Windows 8.1

If you are using an older app not designed for Windows 8, one of the solutions designed for handling such problems in Windows 8 is Compatibility Mode. I have looked at this feature in the past, but Windows 8s new user experience makes accessing it a bit different from previous versions of Windows. Lets get started. For the purposes of this article, I will be installing my 3G Modem Dashboard software Mobile Partner software.

Compat opt 1

The first thing you need to do is point where the setup files are located. If you are installing from a thumb drive or CD/DVD. Launch File Explorer (Windows key + E) and open the location where the setup files are stored.

Right click the setup file for the program, this can be designated as setup.exe or something similar. Click Troubleshoot Compatibility

Compat opt 2

This will launch the Program Compatibility Troubleshooter wizard which will check for issues.

Compat opt 3

Select the option “Troubleshoot program”

Compat opt 4

Depending on the problems you are experiencing when attempting to install or use the software, check off the problems. In my case:

  • ‘The program worked in earlier versions of Windows but won’t install or run now’
  • The program requires additional permissions.

Click Next

Compat opt 5

Select a version of Windows the program is known to work in. I notice the program works great in Windows Vista (with Service Pack 2), so I will select that option. Click Next

Compat opt 6

Proceed to run the through the programs setup routine by clicking Test the program….

Compat opt 7

Follow the on screen instructions to install the program as you normally would.

Compat opt 8

If all is successful, click the option at the end of the wizard ‘Yes, save these settings for this program’

Compat opt 9

Wait while your settings for the program are saved.

Compat opt 10

Click Close.


11 Comments

Filed under 8 Journal, Windows 8