Category Archives: 7 Journal

How to migrate from 32 bit versions of Windows to Windows 8 64 bit

Windows 8 64 bit continues Microsoft’s journey to 64 bit computing ubiquity. So far the majority of new laptops and desktop computers I have encountered are running 64 bit Windows 8 out of the box. In fact, all new x86-x64 devices come preloaded with 64 bit Windows 8. The only 32 bit devices you might see are the Windows RT based solutions. This was not the case with Windows 7 since some systems still came with less than 4 GBs of RAM which made 32 bit Windows a logical choice because of the limitations with the amount of RAM it can address. Over time though, persons have either upgraded their default configurations with additional RAM and would like to take advantage of 64 bit computing which includes the ability to do more multi-tasking, take advantage of multimedia applications and photo editing software or just the key security benefits the platform has to offer. Lets not forget, RAM is very cheap these days, so why not?

Resources: How to obtain 64 bit Windows 8 installation files.

Is my computer 64 bit capable?

Before you can start the process to migrate to 64 bit Windows, you need to find out if your system is 64 bit capable. If you are already running a 32 bit version of Windows 8 on you system, you can find out by doing the following:

Press Windows key + X on your keyboard

image

Click System

image

Look under System > System type:

There it will list whether the processor is x64 based processor or not. In my case I have 64 bit capable processor. Once you have confirmed this, you can move on to the next step.

For Windows XP, Vista or Windows 7 users

image

You can determine if your processor is 64 bit capable by using a free tool called CPU-Z. You can download it here. Once you have it installed, double click it and it will scan your system. Click the CPU tab and look in the Instructions field, look for the instruction set called AMD64 or EM64T. If you see them, then your processor is 64 bit capable.

If you are running a 32 bit version of Windows, whether Windows 8 or Windows 7, you need to consider carefully the steps to migrate from it to 64 bit Windows 8. Regardless of the ubiquity of 64 bit computing, key factors such as hardware and application compatibility remain a issue, especially for legacy systems.

Does your system meet all the requirements? Having just a 64 bit capable processor is not the main go ahead for 64 bit Windows. What about other hardware such as your video card, audio device, printer and any other critical device or application you are using? Also, if you have less than 4 GBs of RAM, I strongly suggest you stick with 32 bit Windows 8 or consider maxing out the installed RAM before you consider upgrading and when I say maxing out, I mean 4 GBs or more.

The first thing to do is to create an inventory of both your hardware and software programs. After doing that, go to the manufacturers website and check if there are any 64 bit drivers available. The manufacturer might not have native 64 bit Windows 8 drivers, but they just might have 64 bit Windows 7 and Vista drivers which should work. The reason why is Windows 8, Windows 7 and Vista all share the same driver model. Application compatibility remains critical, for instance, if you are running applications designed for Windows XP or apps that are not fully 32 bit, you might want to reconsider your decision. Applications that are 32 bit but might contain 16 bit code will not work with 64 bit Windows. So, you need to carefully think this true. If it ain’t broke, don’t try fixing it might just apply in this case.

Backup, Backup, Backup

Once you have gathered all the necessary prerequisites such as driver updates and have certified all your applications are compatible, you need to backup your personal data. There is no upgrade path from 32 bit versions of Windows to Windows 8 64 bit. Yes, that means you will have to reinstall all your drivers (64 bit native drivers) and applications. Some additional configuration might be required on your part.

The best way to handle some of the migration chores is by using the built in Windows Easy Transfer utility (specifically) for Windows 7 users. If you are running Windows Vista or Windows XP, make sure you download the free Windows Easy Transfer utility, install it and create a backup of your personal files and settings. Lets take a look at doing that.

image

Click Next

image

You have a few options to choose from, the best one would be an external hard disk which is excellent for storing large amounts of information. If you don’t have an external hard disk, you can save your backup to a network share if one is available.

image

Select this is my old PC.

image

Wait while your personal files are scanned.

image

Check off the accounts you would like to have backed up.

image

You can create a password if you want to protect your Windows Easy Transfer backup. If don’t want to, no problem skipping this step. Click Save.

image

Open the external hard disk and save the file there, you can give a unique file name if you wish.

image

Wait while your items are backed up and saved. This can take some time depending on the amount of information you have stored.

Once your files are backed up, its time to start the migration.

If you attempt to start the installation of a 64 bit version of Windows from within a 32 bit version of Windows, you will receive the following error message.

image

Which is understandable, since you are running a 32 bit version of Windows. To begin the installation, we will need to restart the computer and boot from the disc or USB thumbdrive which contains the installation files. So, click the close button.

Restart your computer then load your BIOS and set it to boot from your DVD drive or USB thumb drive. You might need to consult your computer manual for instructions how to do this. See the following article for additional instructions.

To learn how to change your BIOS options to boot from the DVD drive, the following tutorial:

http://notebooks.com/2011/05/05/how-to-load-bios-and-change-boot-configuration/ 

image

The Windows 8 logo will appear on screen, this might be here for a while, as long as your see the indicator, everything should be ok.

image

You should now arrive at this screen, select your time and currency format then click Next.

image

Click Install Now

image

Wait while setup starts up

Dual-20_thumb1

Enter your product key when prompted

Dual-21_thumb2
Accept the End User License agreement and click Next

image

Click Custom install Windows only (advanced)

image

Select the system drive where Windows 8 is installed.

image

You will receive the following warning:
The partition you selected might contain files from a previous Windows Installation. If it does, these files and folders will be moved to a folder named Windows.old. You will be able to access the information in Windows.old, but you will be able to use your previous version of Windows.

(At all cost, do NOT click anything named Format or Delete or Partition. So even doing a custom install, your personal files are still preserved. Click OK
Setup will now start the installation. During the installation, your machine will be restarted several times.

image

When the installation is complete, you can complete the Out of Box experience such as selecting your computer, create a username, password, your time zone. You can then proceed to download the latest updates for Windows and reinstall your applications and drivers.

image

Windows 8 Out of Box Experience page

You can then recover your personal files from the Windows.old folder and reinstall all your applications and drivers. Or you can use Windows Easy Transfer to restore your backup.
How to retrieve your files from the Windows.old folder – Microsoft

image

You are now running 64 bit Windows 8.

5 Comments

Filed under 7 Journal, 8 Journal, Windows 8

How to migrate from Windows 8 Preview Releases: Default Installation

Back in October I wrote an article about migrating from the Windows 8 Preview Releases in a dual boot configuration. For example, if you had Windows 7 on your boot drive and Windows 8 on a logical partition. In this article, we look at migrating from Windows 8 Preview Releases in a default install configuration. This means, if you are an enthusiastic early adopter who had installed Windows 8 over your commercial copy of Windows XP, Vista or Windows 7.

With the expiry date for the Windows 8 Preview releases (Developer, Consumer and Release Preview) approaching (January 15th 2013), you will need to start migrating from it to either the final release of Windows 8 or your previous commercial copy (XP, Vista or Windows 7). In this article, we take a look at doing that.

If you decide to upgrade to the final release, in order to install Windows 8 Pro upgrade, you will first need to reinstall your original version of Windows that was running on your computer prior to installing the Windows 8 Release Preview. Whether that is (Windows XP, Vista or Windows 7). After installing it, you can then do an upgrade to Windows 8 Pro. The Windows 8 Release Preview does not support upgrades to Windows 8 Pro.

Even if you are able to do the install, you might encounter problems trying to activate it because a compliance check was not done again a qualifying version of Windows (XP SP3, Vista or Windows 7).

Getting Started

image

Windows 8 preview release

In this example, we will be migrating from Windows 8 Release Preview to Windows 7. The same principles should also work for the Developer Preview or Consumer Preview. In the above screenshot, I have a typical Windows 8 Release Preview install I have been using for a while. Over time, I have accumulated a lot of data on it. Of course, you don’t want to loose this data, so you will need to back it up.

Backup data

Option 1: You can backup your data by copying over your User folder to an external hard disk. See our previous article which discusses the steps to do this.

Option 2: You can use the built in Windows Easy Transfer wizard to backup your personal files and settings and restore them on Windows 7 or if you plan to migrate to the final release of Windows 8. This is an optimal method that ensures your migration is as smooth as possible.

Option 3: You can use your Windows 7 disc and do a custom install over your Windows 8 preview install and recover your data from the Windows.old folder. If you have the full version Windows 8 OEM System Builder disc, you can use this method too and forgo the need to reinstall a qualifying license.

We will be looking at Option 2 & 3 for this article.

Windows Easy Transfer

The reason why I recommend a Easy Transfer is as a precautionary measure, which you can have in case something goes wrong in Option 3, for example if you format the partition instead of doing a custom install. You can launch Windows Easy Transfer by pressing Windows key + R

Windows Vista users:

This method will not work for you because the Windows Easy Transfer .mig file created in Windows 7 or Windows 8 are not backward compatible with Windows Vista. This means you will have to do a manual backup your personal files, see the following article for instructions:

How to migrate from Windows 8 Preview Releases- Dual Boot Setup

To launch Windows Easy Transfer in Windows 8, open the run command (Windows key + X):

image

Then type the following:

%windir%\system32\migwiz\migwiz.exe

image

Click OK

This will launch the Windows Easy Transfer wizard.

image

Click Next

image

You have a few options to choose from, the best one would be an external hard disk which is excellent for storing large amounts of information. If you don’t have an external hard disk, you can save your backup to a network share if one is available.

image

Select this is my old PC.

image

Wait while your personal files are scanned.

image

Check off the accounts you would like to have backed up.

image

You can create a password if you want to protect your Windows Easy Transfer backup. If don’t want to, no problem skipping this step. Click Save.

image

Open the external hard disk and save the file there, you can give a unique file name if you wish.

image

Wait while your items are backed up and saved. This can take some time depending on the amount of information you have stored on the Windows 8 Preview.

Wait while the backup completes. When it is finally finish, you can proceed to reinstall Windows 7 and do the restoration.

http://www.notebooks.com/2009/10/07/using-windows-easy-transfer-in-windows-7/

*****************

Doing a Custom Install

Using the custom install option allows you to reinstall your original copy of Windows while preserving your personal data by moving it to the Windows.old folder. Of course, you will need to reinstall your applications and hardware drivers. To begin, retrieve your installation disc for your copy of Windows and make sure you have the product key.

  • Boot to the Windows 8 desktop.
  • Insert your Windows 7, Vista or XP disc
  • Click Install Now (Windows XP users, please restart from the installation or recovery disc).

To learn how to change your BIOS options to boot from the DVD drive, see the following tutorial:
http://notebooks.com/2011/05/05/how-to-load-bios-and-change-boot-configuration/

If you have an RTM disc

If you have the original RTM disc for Windows 7 or Vista, you can download an updated disc with Windows 7 SP1 or Vista SP1 integrated. This should at least take some of the load off when it comes installing post SP1 updates or Service Pack 2 for Vista.

Download the corresponding edition of Windows 7 you have a license for from the following link. You can identify the edition on the COA sticker attached to your machine, at the bottom or within the battery compartment (laptop) or top/side if its a desktop computer.
COA Certificate of Authenticity:
http://www.microsoft.com/howtotell/content.aspx?pg=coa
What is the Windows Certificate of Authenticity?
http://windows.microsoft.com/en-US/windows7/What-is-the-Windows-Certificate-of-Authenticity

Windows 7 (English) with Service Pack 1

Windows Vista SP1:

(The above Windows Vista image allows you to install the appropriate edition by having the appropriate key).

32 vs 64 bit
http://windows.microsoft.com/en-US/windows7/32-bit-and-64-bit-Windows-frequently-asked-questions
Is my PC running the 32-bit or 64-bit version of Windows?
http://windows.microsoft.com/en-us/windows7/find-out-32-or-64-bit
http://windows.microsoft.com/en-US/windows7/Installing-and-reinstalling-Windows-7

ImgBurn – In addtion to supporting the creation of CD’s from .ISO files,
it supports a wide range of other image file formats, and it’s free.
(BIN, CUE, DI, DVD, GI, IMG, MDS, NRG, PDI and ISO)
http://www.imgburn.com/
http://neosmart.net/wiki/display/G/Burning+ISO+Images+with+ImgBurn

Note: Always use the slowest burn speed (4x or 2x) if offered a choice.

Unfortunately, Windows XP users will need to get a hold of a genuine copy of Windows XP with SP3 disc. It should not be hard to get one, but will require that you look for one if you can’t find yours.

If Windows came preinstalled on your computer.

If Windows XP, Vista or Windows 7 came with your computer, this might be a bit tricky depending on the version of Windows you are running and the options you selected during the installation of the Windows 8 preview. I have noticed that installing later versions of Windows can sometimes render a recovery partition inoperable.

Some computers that come preinstalled with Windows often have what is called a recovery partition. This is used to reinstall the operating system in the event of a system crash. To access it, you will need to boot into it when you start your computer by pressing a function key. This can be either F1, F2, F9, F10, F11, F12 or even DEL or Tab key. Consult the owners manual that came with your PC for instructions about how to reinstall Windows.

This is how the recovery partition is accessed for the most popular computer brands:

  • For Dell, press CTRL + F11 directly after powering up the unit.
  • For HP, press F11 directly after powering up the unit
  • For Toshiba, press and hold ‘0’ BEFORE and during the power up
  • For Acer, press and hold ALT + F10 as soon as you see the logo.
  • For Samsung: Tap the F4 Key at the Samsung logo when you first power on.
  • For Asus, press F9 as soon as you see the Asus logo.
  • For Advent, restart your computer. Then Press F10 repeatedly until the message “Starting System Recovery” is displayed
  • Lenovo http://www-307.ibm.com/pc/support/site.wss/document.do?lndocid=MIGR-4HWSE3
    Lenovo notebooks include a feature called the Lenovo OneKey Recovery button, which is used to boot into the Recovery Environment and reinstall Windows.

If your recovery partition happens to be damaged, then you will need to use the link to download the corresponding edition of Windows you have a license for and use the product on you COA sticker. Again, Windows XP users will need to borrow a disc or likely use the recovery discs that came with your system.

Doing the Custom Install

A custom install allows you to reinstall Windows without actually formatting the hard disk.

image

You can Start the installation from within Windows 8 preview. Click Install Now.

image

Wait while setup copies files.

image

Select the option ‘Do not get latest updates for installation

image

Accept the license agreement, then click Next

image

Click Custom (Advanced)

image

Select drive C:\ where Windows 8 installed.

image

An important warning will appear on screen, click OK

image

Windows will now begin the installation process.

image

When installation is complete, setup your user account and password.

Recovering your personal files

Now the important part of doing this will be recovering your personal files. To do that, browse to the root of the drive where Windows is installed, normally C:\. There you will see a folder called Windows.old

image

In this folder you will find your old User folder with all your personal folders for Documents, Pictures, Music, Videos etc. You can copy the contents from within each folder and paste them into your respective personal folders in Windows 7.

image

After you have copied over your data, you can delete the folder if you wish. This is just the basics though and you might have other data stored elsewhere that you need to recover from the Windows.old folder such as email or even your iTunes Library. See the following article for instructions about recovering email and other data files.

http://notebooks.com/2010/11/09/how-to-recover-documents-music-and-email-after-upgrading-with-the-windows-old-folder/
These steps should work similarly for Windows Vista users.

For Windows XP Users

The steps will be a bit different. Instead of starting the installation from within Windows 8, you will need to boot from your original installation disc and do a custom install. Before you do that though, I strongly recommend you backup your User folder using the instructions provided in the previous article about migrating from Windows 8 previews. You can simply copy the User folder over to an external hard disk or thumb drive with enough space.

  • Insert your Windows XP CD, then restart your computer.
  • When prompted to boot from the CD, do so. This requires pressing any key on your keyboard.
  • Windows XP will go through its setup process.
  • Once you arrive at the Welcome Setup, press Enter on your keyboard to begin the setup process. (If you encounter any problems reinstalling Windows XP at this stage such as the hard disk not being detected you need to boot into the BIOS and set the hard disk to IDE mode).
  • Press F8 on your keyboard to accept the license agreement.
  • Select the partition and press D on your keyboard to delete it
  • Select Format the partition using the NTFS file system
  • Press F on your keyboard to begin the formatting.
  • Installation files will now be copied to your hard disk
  • Your system will be restarted, Windows XP setup will continue

If you have Recovery Media instead of a standalone installation disc.

If Windows XP came with your computer, then you need to backup your data manually since a recovery disc will format the drive and restore the computer back to its factory state. This also applies to Windows Vista if you don’t use the standalone link to a Windows Vista disc image provided earlier in this article.

Backup Outlook and Windows Mail data

http://www.howto-outlook.com/howto/backupandrestore.htm

How do I import and export email, contacts, and calendars with

Finding your product key

If Windows 7, Vista or XP came preinstalled on your computer, then you will likely need to use the product key located on the COA (Certificate of Authenticity) sticker located at the bottom of your laptop or top/side on a standalone tower computer.If the sticker is damaged or faded, you will need to contact the manufacturer for a recovery disc this since this will exempt the need to use a product key.

Resources:

How to migrate from Windows 8 Preview Releases: Dual Boot Setup

4 Comments

Filed under 7 Journal, 8 Journal

Windows 8 Pricing and Availability Revealed

Today information regarding availability of Windows 8 and pre-order information was announced by several sources.

Starting today, you can reserve a packaged DVD of the upgrade to Windows 8 Pro for $69.99 USD ERP* (U.S.) at select retailers. When you receive your copy of the Windows 8 Pro upgrade, you’ll see that the packaging takes a fresh approach, in the reimagining of Windows. Your package will feature one of 5 vibrant illustrations – you can check out all 5 here on Facebook. We moved to paper based materials (the exception of course being the upgrade DVD inside) which allowed us to make an 80% reduction in greenhouse gas emissions and fossil fuel consumption. And we’ve reduced the packaging weight by 41%.

Win8_Pro1

In the U.S., you will find this offer at Amazon.com, Best Buy, Staples, Office Depot and the Microsoft Store and many more. I suggest checking with your local retailers.

Learn more here

If you don’t want to go the retail packaging, you can purchase Windows 8 as a digital download for $39.99. All distributions of Windows 8 with exception to the OEM versions are upgrades. So if you do not have a qualifying version of Windows installed on your machine (Windows XP, Windows Vista or Windows 7), you should purchase the OEM version of either Windows 8 or Windows 8 Pro.

Pricing:

  • Windows 8 Professional Upgrade – $69.99 (save $130)
  • Windows 8 Pro Pack – Product Key Card (no media) – $69.99 (save $30)
  • Windows 8 (Full Version) – OEM $99.99
  • Windows 8 Pro (Full Version) – OEM $139.99

Source ZDNet and New Egg

Microsoft has also introduced some changes to the retail boxed package, with a slimmer more eco-friendly design. Considering that this is probably the last release of Windows we are seeing in a retail package, I will definitely be picking up a copy. Check it out.

image

image

The design is a bit artsy, reminiscent of the Adobe Creative Suite products with a flare of the ‘Sounds of the 80’s.

Leave a comment

Filed under 7 Journal, 8 Journal, Windows 8

20 Plus Tips to Get Started with Windows 8

If you access to one of Microsoft’s subscription services for Software Developers and IT Professionals, then you can download Windows 8 today. Here are some links to get you started with Windows 8:

Install, Upgrade and Activate

General Task

Personalization & Customization

Change and Configure Hardware

Miscellaneous

2 Comments

Filed under 7 Journal, 8 Journal

Installing Windows Essentials 2012

Microsoft recently introduced a preview of its next generation of free media tools called Windows Essentials 2012. You might notice the Windows Live branding has been replaced. In this article, we take a quick look at installing and configuring the new version.

To download Windows Essentials 2012, just go to the following link:

http://windows.microsoft.com/en-US/windows-live/essentials-home

image

Click the Download now link, once you download it, click Run or double click the setup file.

Setup 1

Once setup begins, you will see the setup screen.

Setup 2

Windows Essentials includes a suite of free programs for communication, photo management, video edition, email, blogging, cloud storage and email syncronization. If you want, you can choose on the programs you want to install by clicking ‘Choose the programs you want to install’

Setup 2b

The Windows Essentials 2012 custom install screen. Once you have made your choice, click Install and the installation should begin.

Setup 3

Windows Essentials 2012 installing.

Setup 4

Once installation is complete, click close.

Configuring Windows Essentials 2012

Setup 5

Once setup is complete, click the Accept button for the End User License Agreement.

Setup 6

Then sign in to start using Windows Essentials 2012.

image

You can access Windows Essentials from the Windows 8 Start Screen.

Previously:

How to Install Windows Live Essentials 2011 – the New Install Experience

3 Comments

Filed under 7 Journal, 8 Journal

How to upgrade from Windows 7 to Windows 8

In this final series looking at upgrading to Windows 8, we transition from the most recent version of Windows, Windows 7. Launched in October 2009, Windows 7 is Microsoft’s most successful release of the operating system to date. With an estimated 630 million licenses sold, Windows 7 probably represents the pinnacle of success when it comes to client operating systems.

Is it worth upgrading to Windows 8 from Windows 7?

This is ultimately a personal decision, Windows 7 is a modern operating system that supports all the advances available today in hardware and software. It also prepares for a future that is centred around mobility and touch. Windows 7 also supports many of the significant changes that have occurred on the Internet in the past 10 years. What more could you really want in a desktop OS?

Windows 8 does introduce some specific advances where Windows 7 does fall short and I will list some of them here:

  • Fast Boot – Windows 8 boots significantly faster than Windows 7, in fact on an SSD, I can have Windows 8 up and running in 5 to 7 seconds.
  • Fully Touch Ready – This has been a miss on on prior versions of Windows going back to Windows XP Tablet PC edition. Windows 8 features a smart, fluid and fast interface that is significantly engineered for Touch called the Start Screen. There is just no disadvantage when using it with Touch. You can swipe, pan, zoom and do all the key actions expected on a Touch device. Microsoft has also created an environment that will encourage third party developers to create touch ready applications just for Windows 8. These applications will not run on Windows 7.
  • Fully compatible with existing hardware and software. If it works with Vista or Windows 7, it is guaranteed to work with Windows 8.
  • Tighter Internet integration – Windows 8 features a holistic integration with services that deliver information right to your screen without much need for you to find and discover it.
  • The ability to sync information across multiple devices makes Windows 8 a truly Internet ready operating system.

These are just some of the key areas where Windows 8 advances over Windows 7. They may or may not entice you, but if you are going to upgrade, here are some steps to help you make a smooth transition to Windows 8.

One of the major differences between upgrading from Windows 7 compared to Windows Vista and XP is, Windows 8 allows you to preserve your installed applications when upgrading from Windows 7. This avoids the need to do things like reinstall hardware drivers and applications. Upgrading also preserves your Windows Settings too.

image

In this scenario, I have a typical Windows 7 setup with some applications installed and some personal files stored in the Documents Library. In this scenario, we are going to upgrade to Windows 7 while looking at how it preserves your existing investments.

Notes:

  • Gather all important application discs and hardware driver discs you might need to be reinstalled.
  • Check the manufacturer and software developers website for updates available and to find out about the status of compatibility with Windows 8. It is possible that if the software is compatible with Windows Vista it will likely work with Windows 8 since they share the same driver model.
  • If you are using software such as iTunes or Adobe programs, remember to deauthorize and deactivate them before running setup.

When making significant changes to your computer such as an upgrade, it is always recommended you backup your system prior to installing a new version of Windows. Thankfully, all editions of Windows 7 includes system imaging, which means you can backup your entire Windows 7 installation and restore it if it fails. Learn more about how to backup your Window 7 installation here

In addition to System Imaging, you can backup just your personal files using Backup and Restore, to do that, check out the following article:

http://notebooks.com/2010/12/27/how-to-backup-to-an-external-hard-drive/
http://notebooks.com/2011/02/25/how-to-restore-a-backup-from-an-external-hard-drive-in-windows-7/

If you want to backup themes, wallpapers and other minor features, Windows Easy Transfer is another option, you can learn more about it here

What you can do before attempting the upgrade?

You can do some pre-requisite tasks to ensure a smooth migration from Windows 7 to Windows 8. If you are using a name branded computer such as a Dell or HP, go to the manufacturers website for the model computer you are using and download the latest available drivers for that computer. Store them on a disc or USB thumb drive. Important drivers you should try to obtain include Network and Video Drivers. Its possible that they might just have Windows Vista or Windows 7 drivers, those will work with Windows 8.

Other things you can do:

  1. Uninstall any security software before attempting to upgrade.
  2. Disable any encryption software you might have installed.
  3. Disable/uninstall disk utility software such as DVD/CD burning utilities or third party defragment programs such as Perfect Disk.
  4. Make sure your computer is updated (devices and applications).
  5. Disconnect any external devices before installing.
  6. Check your hard disk for any errors:
    – Click Start
    – Type: CMD
    – Right click CMD then click Run as administrator
    At the Command Prompt, type: chkdsk /r /f
    Exit the command prompt.
    When you restart your system, your computer will be scanned for errors and attempts will be made to correct them.
  7. Another thing you can do is disable Start items:
  • Click Start
  • Type: MSCONFIG.
  • Hit Enter on your keyboard
  • On the General tab, click Selective Startup.
  • Under Selective Startup, click to clear the Load Startup Items check box.
  • Click the Services tab, click to select the Hide All Microsoft Services check box, and then click Disable All.
  • Click OK.
  • When you are prompted, click Restart.
  • After the computer starts, check whether the problem is resolved.

Run the System File Checker utility.

SFC/Scannow checks your Windows installation for errors and corrects them. This will help with ensuring that a smooth upgrade occurs.

Click Start
Type: CMD, from the results, right click CMD
Click ‘Run as Administrator’
At the Command Prompt, type: sfc/scannow

This will check for any integrity violations

Restart your system

32 or 64 bit

My recommendations depend on what you have installed. If you currently have 32 bit Windows 7 installed, use 32 bit Windows 8. If you have 64 bit Windows 7, use 64 bit Windows 8. This is to ensure a smooth migration, especially where driver compatibility is concerned. Another factor is RAM. If you have max 3 GBs of RAM, then 32 bit should be sufficient for your needs. If you happen to have 4 to 8 GBs or more RAM, then 64 bit would be suitable.

Windows 64 bit comes in handy when you need to address at least 4 GBs or more of RAM. Windows 32 bit can utilize up to 3.2 GBs of RAM. Because the memory address space is much larger for 64 bit Windows, that means, you need twice as much memory than 32 bit Windows to accomplish some of the same task, but you are able to do so much more, you can have more applications open, do things like run an Antivirus scan in the background without it affecting your system performance. Windows 64 bit is more secure too, malicious code cannot easily infiltrate it, drivers are more reliable since they must be signed before they can work with 64 bit Windows.

As for compatibility, you will need 64 bit device drivers for any hardware devices you might have. Also, there is no 16 bit subsystem in Windows 64 bit, which means, your applications must be 32 bit only, not 16 bit installer or uninstallers.

Starting setup

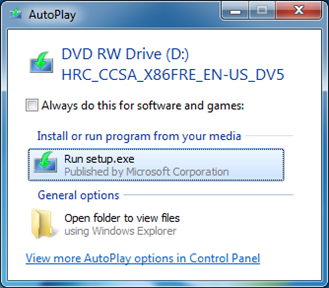
To start the installation, first boot to the Windows 7 desktop. If you are installing Windows 8 from a physical DVD these instructions will apply to you. Insert the Windows 8 disc. When the AutoPlay window appears, click ‘Run setup.exe’. Click Continue when prompted by User Account control.

image

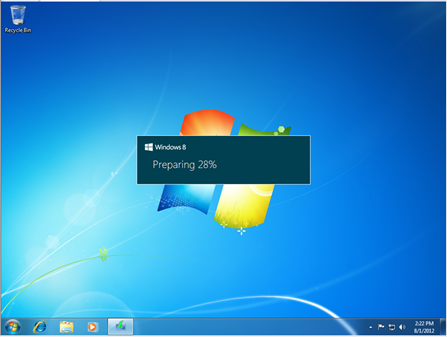
Setup will then begin.

image

Wait while setup prepares to install Windows 8.

image

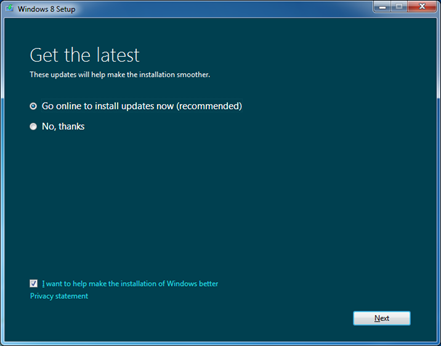
If prompted to get updates, I recommend you do so. If you are not connected to the Internet, select ‘No, thanks’.

image

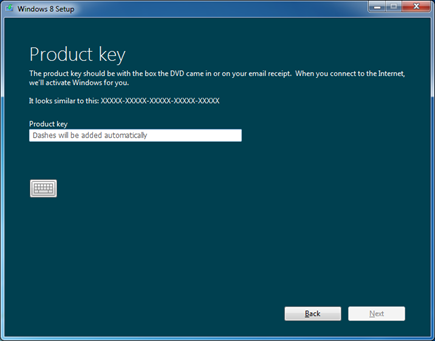
Enter your product key. If you purchased Windows 8 from the Microsoft Store and you are using the Windows 8 Upgrade Assistant, the key will be embedded. If you download a .ISO file or purchased Windows 8 on DVD, check your email when you registered to purchase the upgrade or check your Windows 8 product packaging for the product key. After Entering the product key, click Next to continue with setup.

image

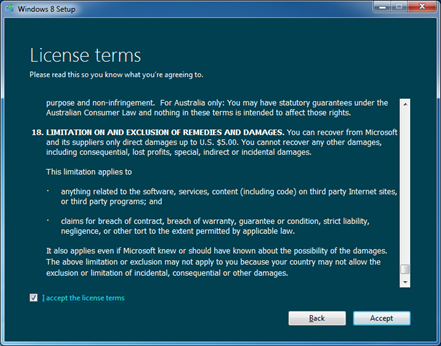
Read and Accept the End User License Agreement.

image

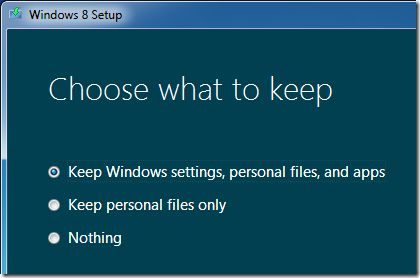
In addition to being able to keep your Windows Settings and Personal files, you can keep your personal files too when upgrading from Windows 7. If you choose Nothing, Windows 8 will place your files in a folder called Windows.old. After making your decision, click Next.

image

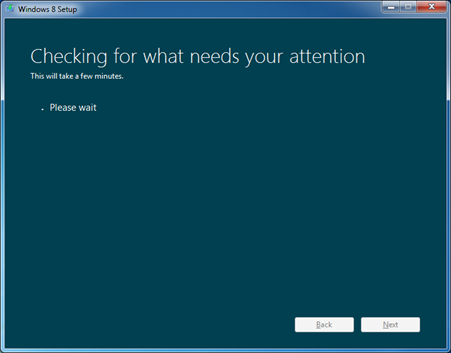
Wait while Windows 8 does some last checks.

image

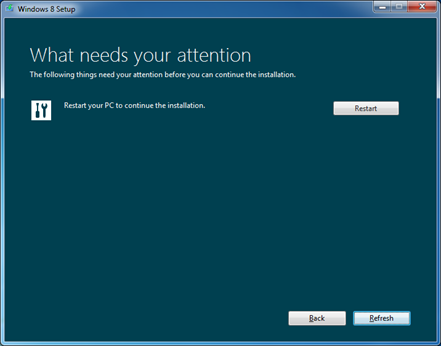
Depending on your configuration, Windows 8 setup might ask you to uninstall a program or driver then restart your system before it can proceed with the upgrade. Don’t worry though, Windows 8 will resume setup automatically. In my case, Windows 8 setup needed a restart before it could continue.

image

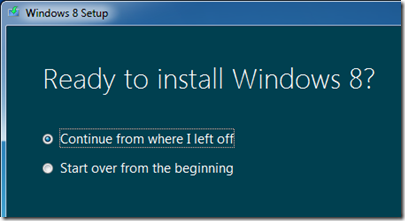
After restarting, Windows 8 setup, asked if I would like ‘Continue from where I left off’. I clicked Next and setup resumed.

image

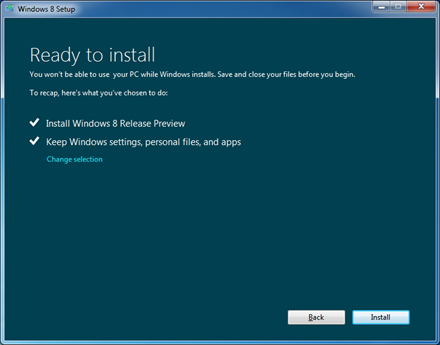
At the summary screen, review the changes that will be made to your computer. If you are not sure, click Back and make any appropriate changes. As noted, you will not be able to use your computer during this period. The time it takes to complete the upgrade will be dependent on your system specifications such as processor speed, memory and your data set. Click the Install button to begin.

image

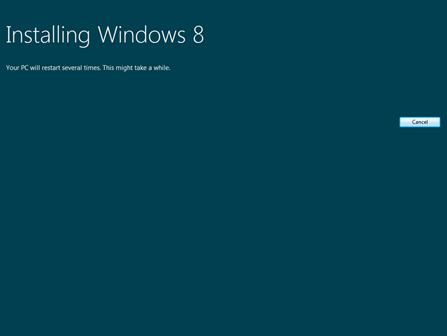
Windows 8 setup will go into full screen mode and restart several times.

image_thumb62_thumb

After your computer restarts, Windows 8 will continue setup. Windows setup will go through several screens indicating Tasks it needs to complete:

  • Windows setup will say its ‘Preparing’
  • Getting your devices ready.
  • Getting system ready

Then restart and setup will continue.

image_thumb86_thumb

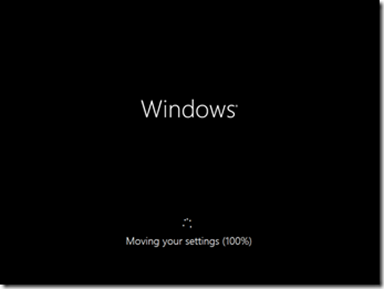
Windows 8 will now indicate it is ‘Moving your settings’

Out of Box Experience.

image_thumb93_thumb

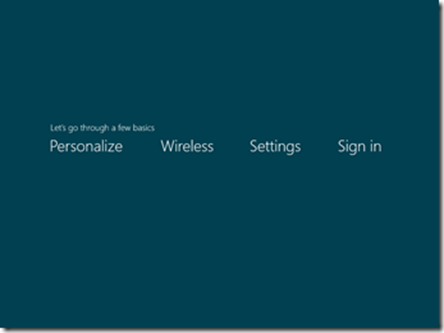
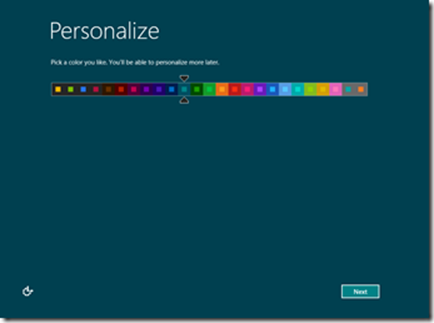
You will now arrive at the Out of Box Experience where you will setup and personalize your Windows experience.

image_thumb99_thumb

The first option presented is the Color Picker, here you can choose a color that represents you. You have up to 25 to choose from. If you can’t decide now, you can always do it later. Click Next

image_thumb105_thumb

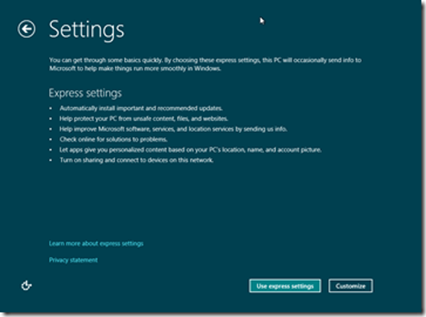
The settings screen screen allows you to customize whether you want to have Windows send information about Windows to Microsoft to ensure it runs smoothly. Click Use Express settings if you accept these actions. If you rather not, you can click Customize and make your choices.

image_thumb83

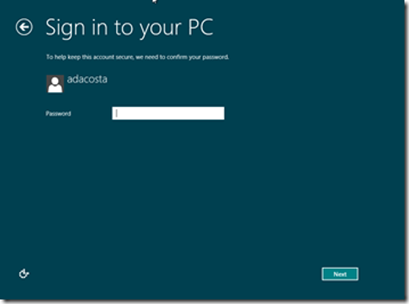
Confirm password which you had used to log into your Windows 7 account. Click Next

image_thumb89

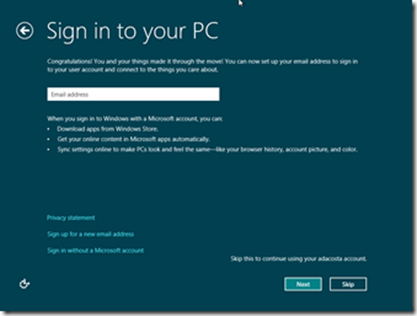
You have the option of setting up a Microsoft Account which allows you to sync your Windows Settings across multiple Windows 8 devices. You can sync some passwords, themes and application settings. If you don’t want to do that right now, click Skip. You can always switch to a Microsoft Account later. Windows 8 will instead use your existing account as a Local account.

image_thumb96

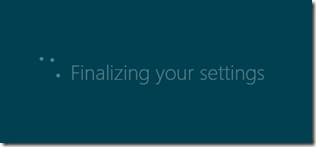
  • Wait while Windows 8 finalizes your settings.

image_thumb112_thumb

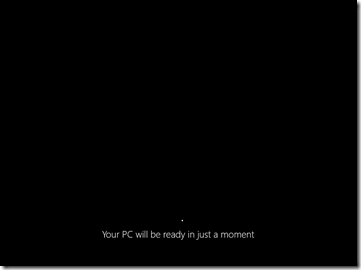
Wait while Windows 8 does some final configuration.

image_thumb121_thumb

You have successfully migrated from Windows Vista to Windows 8. To check if your files are there, launch the Windows Desktop App.

image

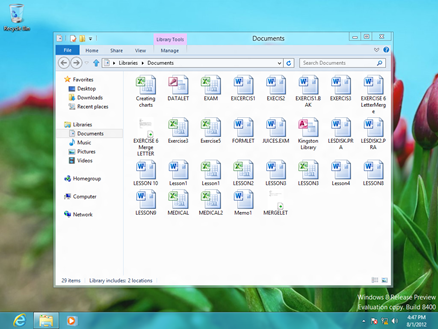
Launch File Explorer on the Windows Taskbar and open documents and you should see all your files previously in Windows 7.

image

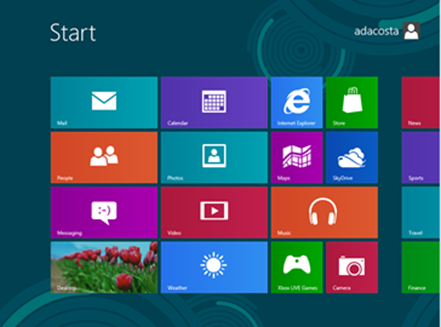
To launch your applications, go to the Start Screen by pointing your mouse pointer to the left hand corner of the Windows 8 screen and click it.

image

Scroll to the right and launch your application.

25 Comments

Filed under 7 Journal, 8 Journal, Windows 7, Windows 8

How to install and configure Skydrive App for Windows

The Skydrive App for Windows has been out for a while now, but I never got around to posting a tutorial about it. I use it often since I want to keep files available across many devices, which includes multiple PC’s at home and work and mobile devices such as my iPod Touch. In this quick tutorial, we take a look at downloading, installing and configuring it including a tip for getting additional storage.

What is Skydrive App for Windows?

Back in 2007, Microsoft launched Skydrive on Windows Live. This was the company’s first major move to embrace the popular term called Cloud Storage. Skydrive is basically an online hard disk, it requires that you have a Internet Connection to sync and store files across multiple systems. With the Skydrive App, you can not only sync files, you can also access them offline. Skydrive includes a familiar Windows Explorer interface that makes it easy to drag and drop files in it, organize and manage them.

Installing Skydrive App:

First, go to:
http://windows.microsoft.com/en-US/skydrive/download-skydrive

Then click Download Skydrive Preview for Windows

image

Double click the setup icon:

image

Wait while Skydrive installs

Setup 1

After the installation is complete, a quick setup wizard will be launched:

Setup 2

Click Get started to begin

Setup 3

Sign in with your Windows Live ID

Setup 4

Click Next, you can change the location of the Skydrive folder if you want, but we will stick to the default for now.

Setup 5

Check the box to make ‘Make files on this PC available to me on my other devices’ then click Done.

Setup 6

That’s it, Skydrive will automatically start syncing your files over the Internet between your PC’s you install and sign into. The above shows Skydrive synced on my Windows 7 PC. The below shot shows my Windows 8 PC:

image

Below is my Skydrive in the Cloud accessed through Internet Explorer:

image

Skydrive works only with Windows Vista, Windows 7 and Windows 8. For Windows XP users, you can access Skydrive through http://skydrive.live.com

Get more storage:

By default, Skydrive offers users 7 GBs of free online storage, but you can get some more using the following options:

In the Notification Are of your Taskbar, right click the Skydrive Icon:

image

Click Manage storage

image

Select one of the available storage options, which includes 20, 50 or 100 GBs for an annual fee.

2 Comments

Filed under 7 Journal, 8 Journal, Computers and Internet

How to downgrade Windows 7 Editions

In this article we take a look at how to downgrade from one edition of Windows 7 to another. For instance, if you have Windows 7 Professional, but would like to downgrade to Windows 7 Home Premium. You might ask, for what reason? Well, there are scenarios where this issue might come up. Maybe you want to reassign Windows 7 Professional to another computer, and install Windows 7 Home Premium on it instead. Maybe the edition is not being used effectively and could be more useful else where such as a laptop you carry to work since Windows 7 Professional includes a lot of business features.

The problem is the process of reassigning licenses, this would probably mean you will have to backup data, prepare to reinstall applications and drivers then restore data. All of this can cost some down time. Luckily I found a cool little third party utility that allows you do this with ease. Its called Windows 7 Downgrader.

Windows 7 Downgrader will let downgrade popular editions such as Windows 7 Ultimate, Enterprise, Professional quickly and easily. Once it downgrades, all you need to do is insert the Windows 7 installation and do a repair upgrade to a desired edition. Lets take a look at how to do it.

First you need to download Windows 7 Downgrader here

Save the file to your hard disk and extract it.

Downgrade

Double click the Windows 7 Downgrader executable (notice I currently have Windows 7 Professional installed)

image

As you can see, the Windows 7 Downgrader utility is quite simple. You have three options which will allow you to downgrade to any of three editions: Ultimate, Professional or Home Premium. Downgrading to Ultimate is useful if you are running Windows 7 Enterprise and would like release that license, but don’t want to go through the chore of backing up and install from scratch.

Once you have identified the edition you would like downgrade to, click it. You might receive error message, click Continue. Do not restart your computer. Insert your Windows 7 installation DVD for the edition you want to downgrade to. In my case, I am downgrading to Windows 7 Home Premium, so I will insert the Windows 7 Home Premium installation DVD.

Step 1

Click Install Now

Step 3

Click Upgrade

WIN7-Step-5_thumb1

What you are doing now is a repair upgrade.

Upgraded

When the downgrade is complete, you should be successfully downgraded to the specific edition.

26 Comments

Filed under 7 Journal

How to fix iTunes Library Locked Permission Error in Windows

The other day I upgraded a friends computer to Windows 7. Prior doing the upgrade, I had deauthorized her iTunes library to preserve the amount of available authorizations he was allowed. Sometimes upgrading Windows on the same machine can count as another machine. After the upgrade was complete and I was ready to reauthorize the machine, when I launched iTunes, I received the following error message:

image

The permission error got me curious as this would suggest something related to privilege. I decided to check out what’s going on with this Library.itl file. Here is how I came to resolve this issue.

Click Start > Music

Open the iTunes Library folder

image

Right click iTunes Library.itl file then click Properties

image

Go to the Security tab, there was my problem. It seems like during the upgrade, all user permissions were removed for this file. All we need to do is add back all the right groups and users with the correct permissions.

Click Edit

image

Click Add

image

Click Advanced

image

Click Find Now

image

Select your user account, SYSTEM and the Administrator (Ctrl + Click to select more than one account at time)

Click OK

Then click OK again

image

For both users you just added, set the permissions to Full Control

image

Click OK

Then click Apply and OK again

You should be able to launch iTunes.

6 Comments

Filed under 7 Journal

How to Organize and Archive Files

Running out of hard disk space? I am and I need to do something about it fast. Backing it up can resolve some of these problems, but I believe sometimes you have to manually do some stuff

image

image

I am a sort of pack rat, I will admit and I have files on these system going back as far as five years ago. I think its time to delete and move some stuff I am no longer using to my external hard disk. Lets take at doing this using the organization tools built into Windows 7. The first place I will start by looking at is my Downloads folder since I do a lot of downloading.

image

In order to properly analyze what we can discard, keep and move to an external hard disk, we will use the Change View menu. Click the Change View menu and click Details.

image

You will now notice that your files are organized with more details. To further customize the view, click on the Date Modified column heading. This will allow us to view the files when they were last used or edited. Another column I recommend you display is the Date Created column.

image

Right click the Column heading and click Date created.

image

This will give us a better idea of the age of the file and if its worth keeping.

image

Looking through my Downloads folder, I have files dating back as far as early 2007 and the last time I accessed them were in 2007. Definitely not worth keeping on the drive. So these files will be archived and moved to my external hard disk.

Archiving

Obviously, to do something like this, you are gonna need an external hard disk. You could choose DVD as a method of backup, but they can be unreliable and more of a chore, especially with disc swapping involved. Once you have identified the files you need to Archive, open your external hard disk and create a folder specifically for these files called Archive.

image

Open it then Go back to the folder (window) where your old files are currently on your local hard disk. Select the files then click Organize > Copy

image

Go back to the Archive folder (window) we created on the external hard disk, then click Organize > then click Paste

image

image

Wait while the files are copied over. After this is completed, go back to the folder and click Organize > Delete or press the Delete key on your keyboard.

Simplify file selection and copying

If you want to select files within a date range, simply select first file then click any file within the range, see below:

image

image

Repeat these steps for other person folders such as Documents, Music, Pictures and Videos. When you have done archiving, you can proceed to permanently delete these files from your Recycle Bin if any are stored there:

image

I was able to get back good 10 GBs worth of disk space just from my Downloads folder alone.

Leave a comment

Filed under 7 Journal